This is an old revision of the document!
How To: Enter a New Patient Account from a Referral
Search to see if there is an existing client and/or patient. See the section above for multiple ways to access this information. From this search you will be able to say whether they have an existing account or they are a new client and/or patient.
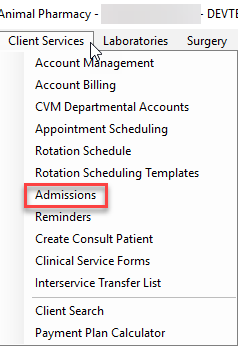
From the main VMIS window, select the Client Services menu option from the top of the screen.
From the dropdown, select the admissions option.
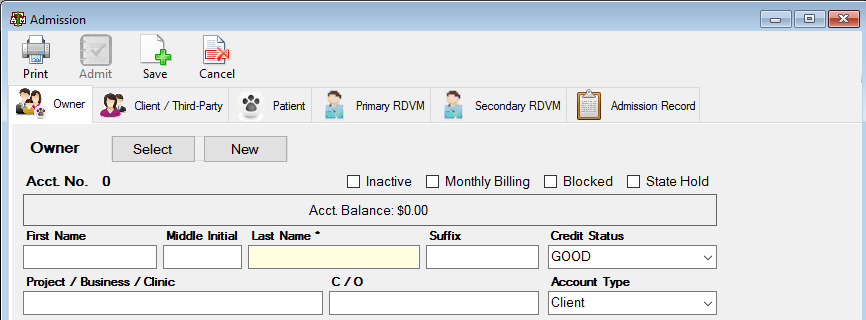
The admissions screen will appear. Select the button in the top left hand corner labeled new.
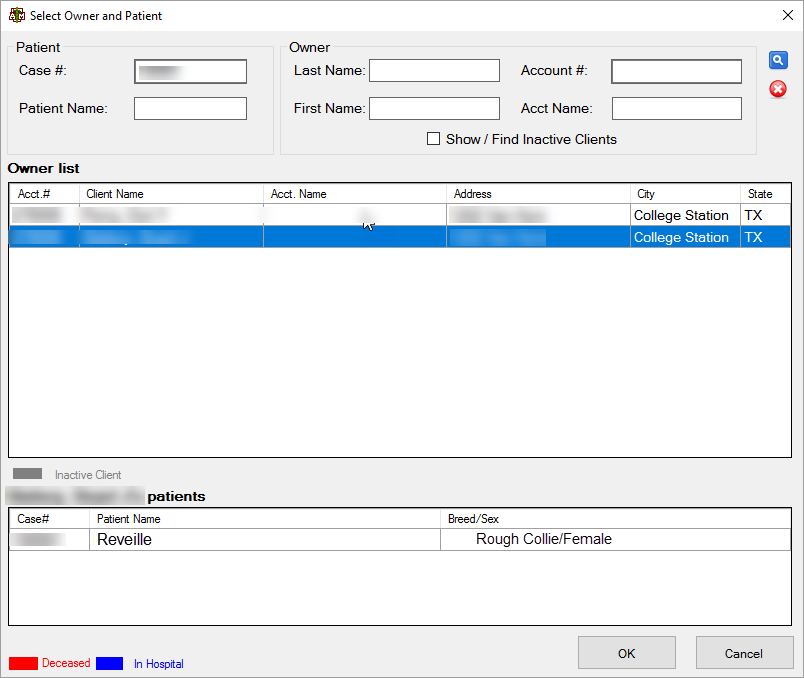
Search the owner and patient that have existing accounts using the case number, or patient name, or owner’s first name and/or last name, or account number, or account.
HINT: The fastest way to search for a client or patient is to add the first 2-3 letters of the name. and press the blue magnifying glass search button. This will give you the widest selection of choices from which to narrow down. (Insert photo)
When the desired patient is located, select the patient name from the box at the bottom of the screen and hit OK. If you only select the owner’s info (highlighted in blue), it will pull up the owner’s information in the Admission Screen.
The admission screen will be automatically filled out with the selected patient’s information. BEFORE entering any additional information, select the tab at the top of the admission screen labeled Primary rDVM.
Once on the Primary Referring Vet tab, hit the select option towards the top of the screen.
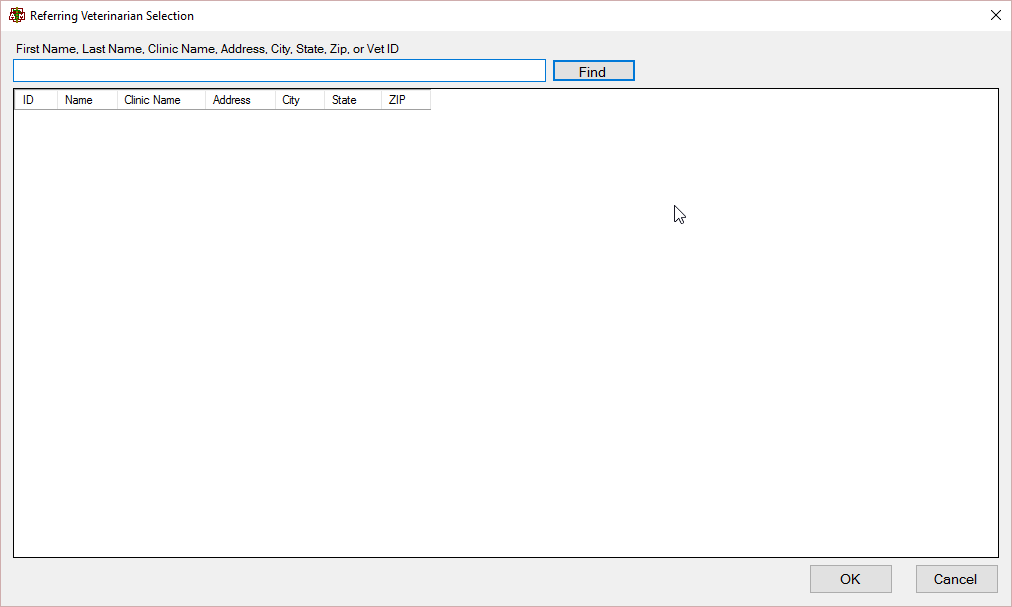
This will bring up the Referring Veterinarian Selection Screen. Search the desired Referring Vet using the Veterinarians First Name, or Last Name, or Clinic Name, or Address, City, State, Zip Code, or Vet ID.
Once the Veterinarian is found, highlight the veterinarian profile and hit OK, or just double click the profile.
Select the Owner Tab at the top of the screen. Fill out the new client information.
Select the Patient Tab at the top of the screen. Fill out the new patient information
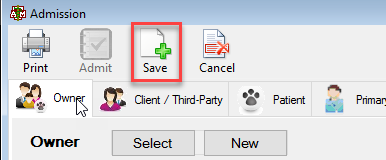
*If the patient is not being admitted/not scheduling an appointment, select the button at the top of the screen labeled save.
If the patient is being admitted or scheduling an appointment
Select the Admission Record Tab. Ensure everything is properly filled out and select the Schedule button next to the appointment field.
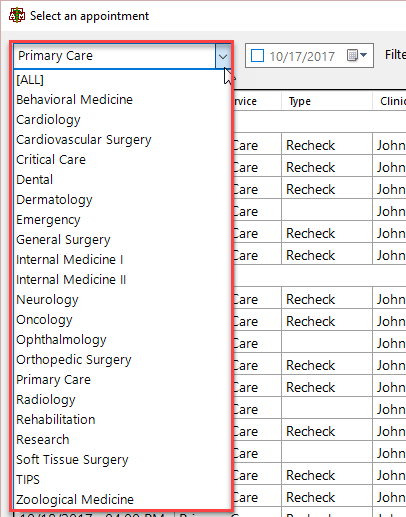
The Select an appointment screen will appear. To filter the appointments by department, select the dropdown in the top left corner of the select an appointment screen.
Select the desired department. A list of all available appointments will appear. To see appointments only for the current date for the department selected, click the check box next to the date drop down at the top of the screen.
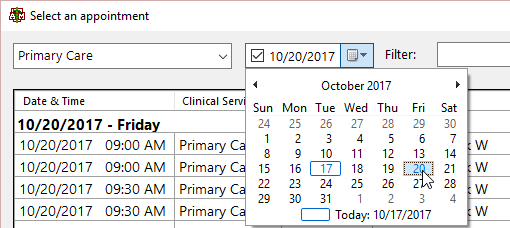
To see appointments for a certain date, click the dropdown and select the desired date.
Double click the desired appointment or highlight the appointment and select the OK button at the bottom of the screen. The senior and attending clinicians will automatically be filled in.
If everything is entered completely and correctly, the admit button will be available to click. See below for the exception to this rule – Collector’s status accounts. Hit save on this screen if not admitting. Save button is located next to the admit button.
If an appointment was scheduled, return back to the scheduled appointments tab and select the heading towards the top of this screen labeled case number.
(Insert photo)
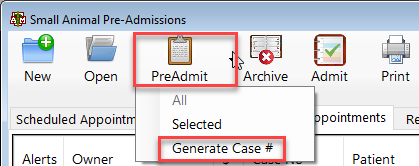
The appointments will now be sorted by case number and those without a case number will be at the top. Notice that the appointment just created does not yet have a case number. Highlight the patient account and select the dropdown arrow next to the pre-admit button.
(Insert photo)
From the dropdown, select the generate case # button to assign a # to the case.
If no appointment was scheduled, you can return back to the Pre admissions screen and select the tab towards the top of this screen labeled pending appointments.
View the pending appointments by the date they were added by clicking the date added field name.
The appointments will now be sorted by date. Notice that the appointment just created does not yet have a case number. Highlight the patient account and select the dropdown arrow next to the pre-admit button.
From the dropdown, select the generate case # button to assign a # to the case.

