How To: Cancel an Appointment
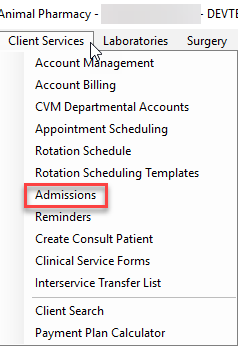
Select the Client Services Menu option from the top of the main VMIS screen.
From the dropdown, select the admissions option.
The pre-admissions screen will appear. Locate the patient. Once found, highlight the account and select OK or double click the account.
The admission screen for the patient will appear. Select the admission record tab on the far right side of this screen.
Once on the admission record screen has appeared, to cancel the appointment, hit the cancel button next to the schedule button on this screen.
NOTE: The department that the appointment was scheduled in and that department’s coordinators need to be notified of the cancellation. We do this so that the cancelled appointments can be filled from our first available lists, etc.


